Chat Bot Guide: This will walk you through the process of setting up your Livecoding.tv chat bot. Follow these steps to install and configure the chat bot to your PC.
How to set up your Livecoding.tv Chat Bot
Install Node.js
Visit Node.js official website. It will automatically detect your Operating System and display a download link. For example, it will display the following download link for 64 bit Windows OS.
Download node MSI for windows by clicking on download for windows link.
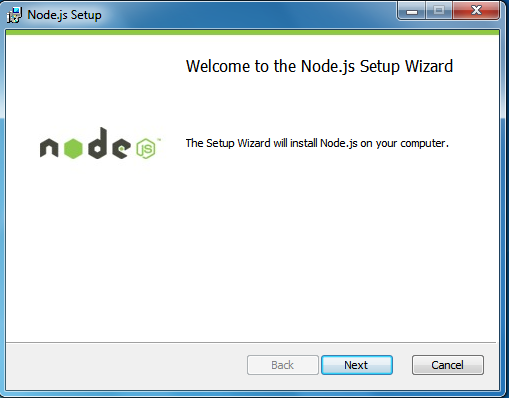
The recommended version is v4.3.2 LTS. After downloading the MSI, the installation window will appear as shown below.
NodeJs installation window
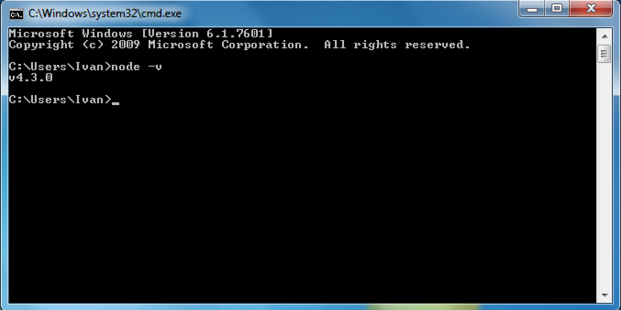
Once the installation has finished, verify it by typing node-v in the command prompt.
Command Prompt
To proceed installing, the bot will fork the repository on Github.
Clone the repository
Use the Github Desktop App. Register an account if you don’t have one and install Github Desktop App.
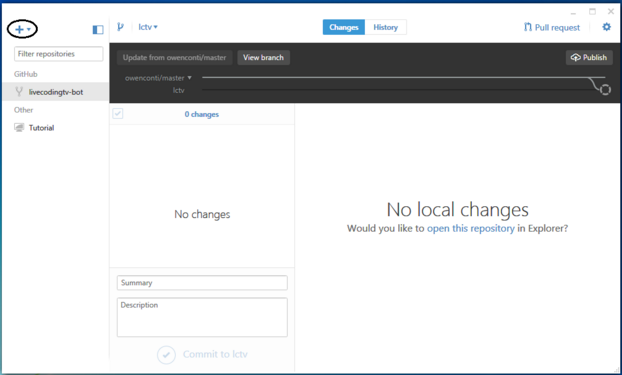
- On the top left corner of the app, click + as shown below.
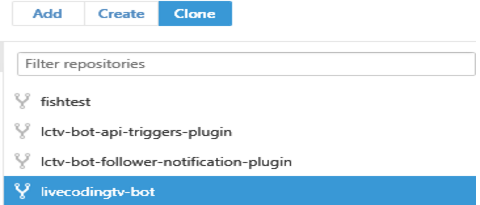
- Select livecoding.tv bot
- Click on ✔ to clone it.
- Choose directory and click Ok.
- Navigate to the livecoding.tv bot directory. Open the setup folder and create a custom folder within the setup folder.
Find your XMPP password on LCTV page
Follow these steps.
- Open your live stream page ( livecoding.tv/USERNAME )
- Open Dev Tools (Ctrl+Shift+I) and switch to the Elements Tab.
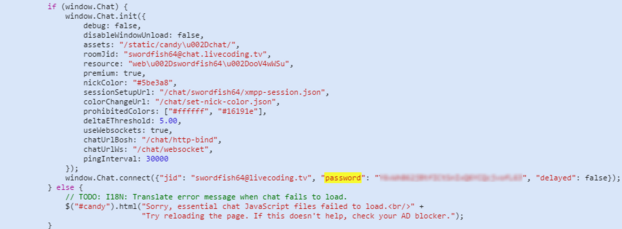
- Search the HTML content (Ctrl+F) for “password“.
- The XMPP password is a long string in the object containing ‘jid‘ and ‘password‘.
XMPP Password
- Create credentials.js file in the custom folder.
- Open Notepad and paste the following:
var username = ‘LCTV_BOT_USERNAME’; // Your Livecoding.tv username
var password = ‘XMPP_BOT_PASSWORD’; // Found in step 3
var room = ‘LCTV_USER_WHERE_BOT_WILL_BE’; // Room username
module.exports = {
room: username,
username: username,
jid: username + ‘@livecoding.tv’,
password: password,
roomJid: room + ‘@chat.livecoding.tv’
};
- Click File>Save as, ‘credentials.js’, Save as type All Files, click Save.
- Create settings.json file in the custom folder.
- Open Notepad and paste the following:
{
“plugins”: {
“notifications”: true,
“api-triggers”: true
}
}
- Click File>Save as, ‘settings.json’, Save as type All Files, click Save.
- Navigate to the directory you’ve cloned the bot. Hold Ctrl+Shift and right click on the folder. Click Open command window here.
- Run: npm install and wait for the installation to complete, then run node index.js.
You will be prompted by firewall to allow network access.
- Click on the Public Network checkbox and select allow.
At this point the bot is ready for your commands. You can enter the following commands in the chat window.
!say [type message] – Verbally speaks a message.
!status – Returns the user status.
!subject [type subject] – Sets the room‘s subject to {subject}.
!todo – List the current TODOs.
!top [input number] – Displays the top {number} viewers.
!voices – Lists the available voices to be used with the !say command.


